> ## Documentation Index
> Fetch the complete documentation index at: https://docs.pesaswap.io/llms.txt
> Use this file to discover all available pages before exploring further.
# Getting Started with Payouts
To get started with **payouts**, ensure you are signed up with the **payout processors** supported by **Pesaswap**.
***
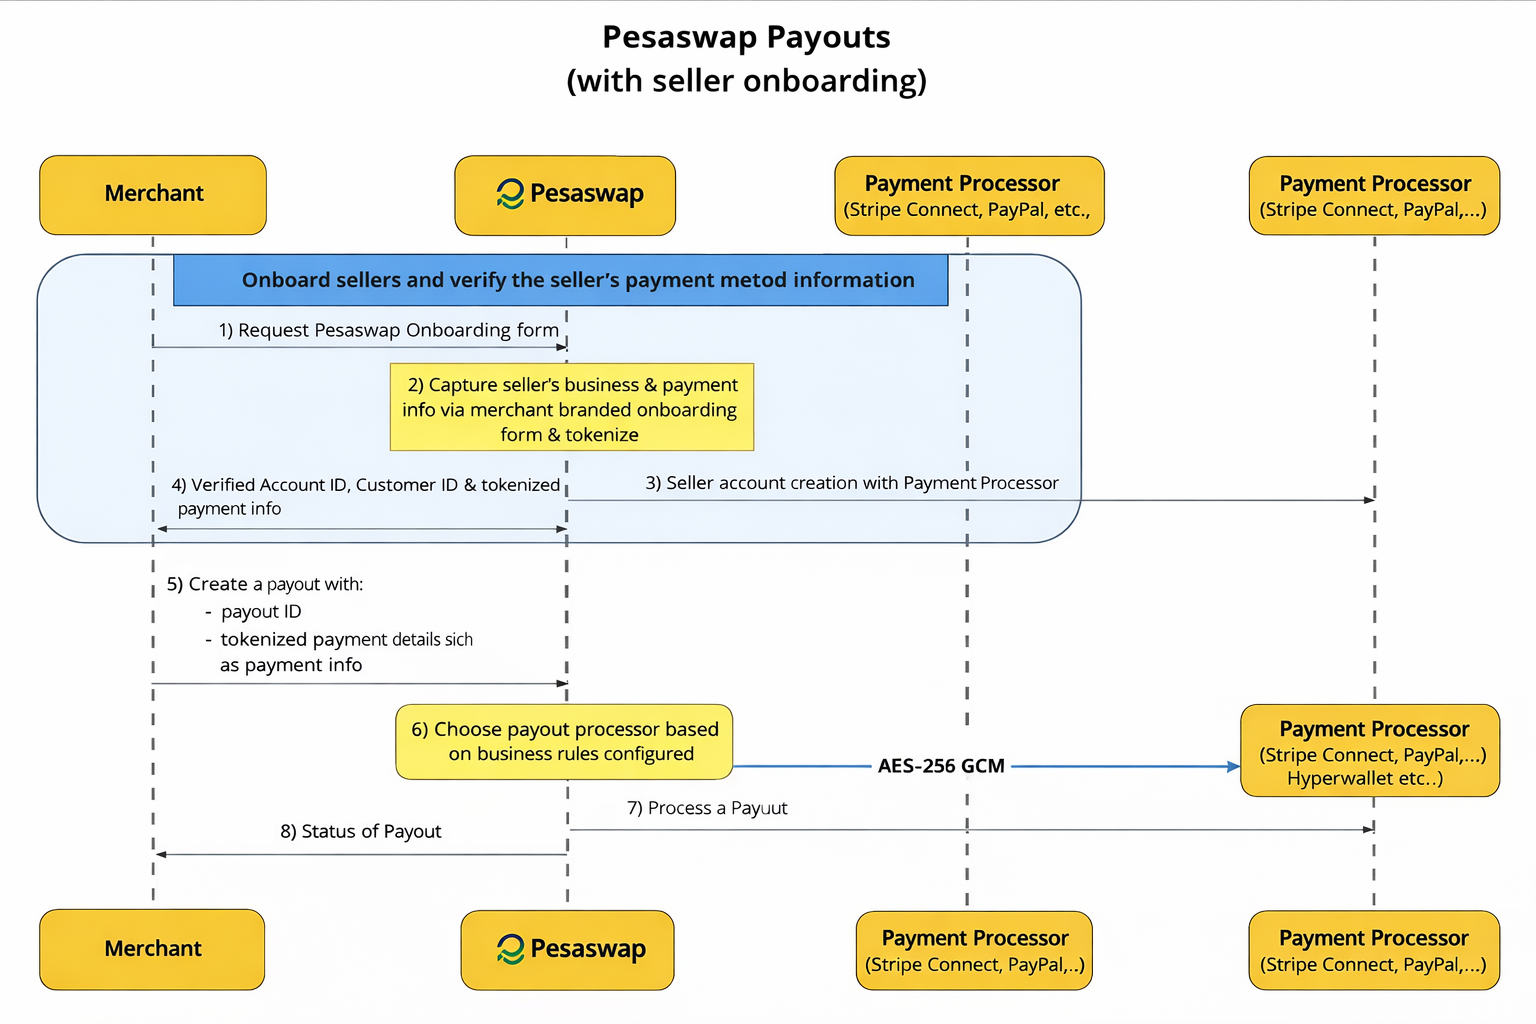
## How Does It Work?
 #### How to get started?
We will be using Pesaswap's hosted dashboard and Postman API collection for configuring connectors and processing payouts. You can find API reference here.
Backend API endpoint - [https://sandbox.pesaswap.io](https://sandbox.pesaswap.io)
Dashboard - [https://app.pesaswap.io](https://app.pesaswap.io)
Pesaswap provides an end-to-end payout solution using:
* A **hosted dashboard** for configuring processors
* A **Postman API collection** for processing payouts via API
#### Pre-requisites
Before starting, make sure:
1. ✅ You’ve created an account at [https://app.pesaswap.io](https://app.pesaswap.io)
2. ✅ You’re logged into the dashboard
3. ✅ You’ve generated an API key under **Developers**
4. ✅ You’ve noted your `merchant_id` from the home page
## Configuring Payout Processors
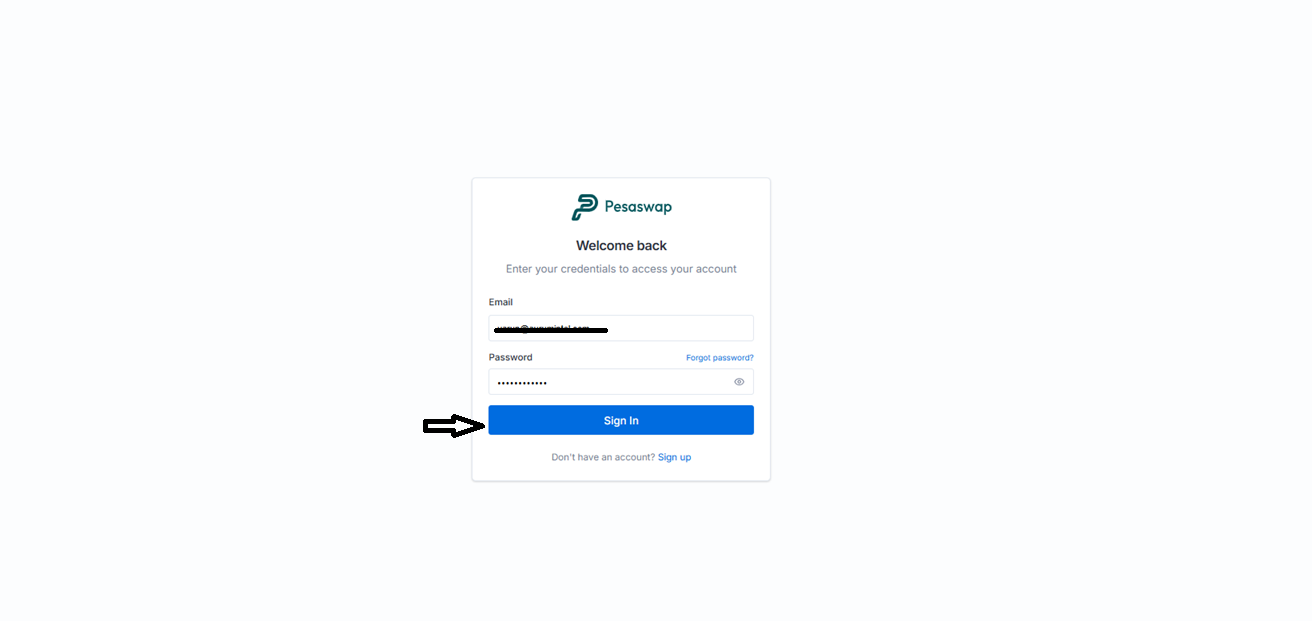
### Step 1 — Log in to your Pesaswap account
Go to: [https://app.pesaswap.io](https://app.pesaswap.io)
#### How to get started?
We will be using Pesaswap's hosted dashboard and Postman API collection for configuring connectors and processing payouts. You can find API reference here.
Backend API endpoint - [https://sandbox.pesaswap.io](https://sandbox.pesaswap.io)
Dashboard - [https://app.pesaswap.io](https://app.pesaswap.io)
Pesaswap provides an end-to-end payout solution using:
* A **hosted dashboard** for configuring processors
* A **Postman API collection** for processing payouts via API
#### Pre-requisites
Before starting, make sure:
1. ✅ You’ve created an account at [https://app.pesaswap.io](https://app.pesaswap.io)
2. ✅ You’re logged into the dashboard
3. ✅ You’ve generated an API key under **Developers**
4. ✅ You’ve noted your `merchant_id` from the home page
## Configuring Payout Processors
### Step 1 — Log in to your Pesaswap account
Go to: [https://app.pesaswap.io](https://app.pesaswap.io)
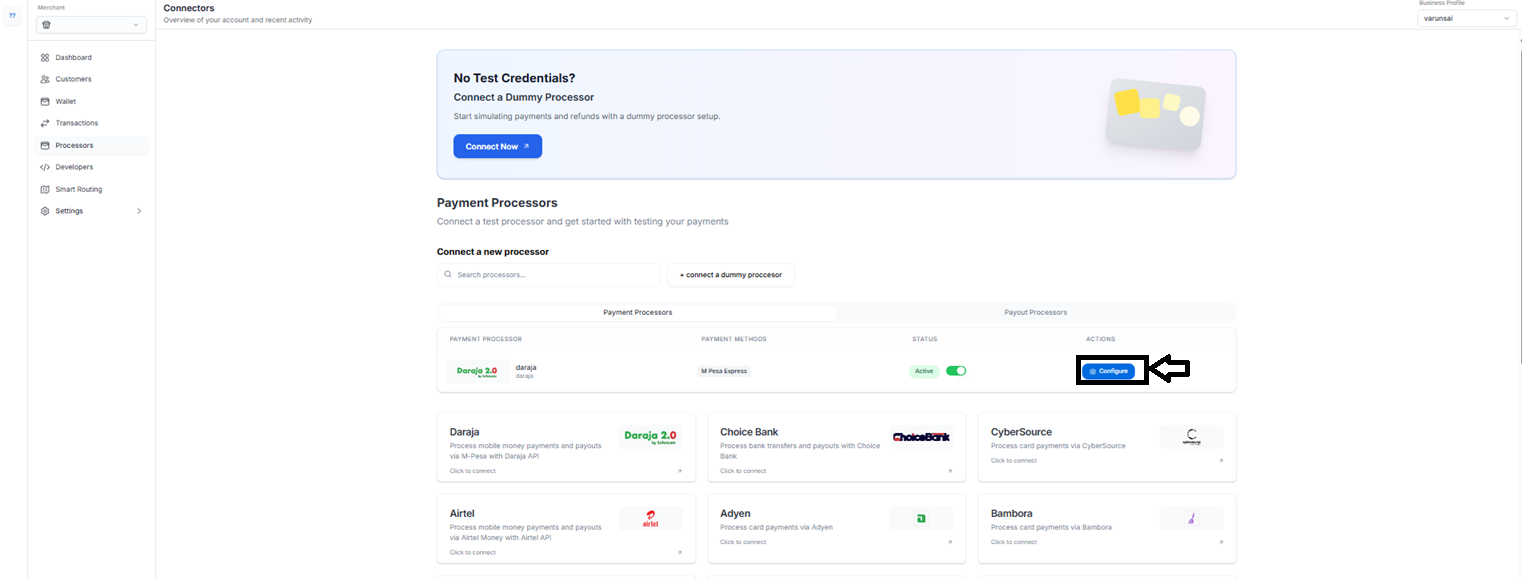
 ### Step 2 — Navigate to the **Payout Processors** tab
This section lists all the supported payout processors.
### Step 2 — Navigate to the **Payout Processors** tab
This section lists all the supported payout processors.
 ### Step 3 — Select a processor & add credentials and Enable preferred payment methods
 Click on your preferred processor and enter the required **authentication keys** or **API credentials**.
Turn on the payment methods you plan to use for payouts.
### Step 5 — Done!
You’ve successfully configured your payout processor!
Click on your preferred processor and enter the required **authentication keys** or **API credentials**.
Turn on the payment methods you plan to use for payouts.
### Step 5 — Done!
You’ve successfully configured your payout processor!
 ## Processing Payouts via Postman
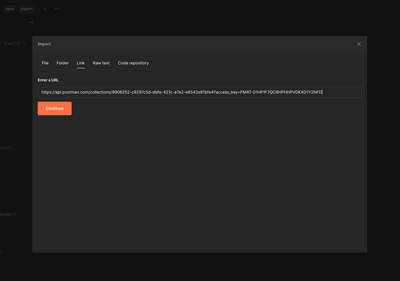
### Step 1 — Import the Postman collection
> Download the collection from the official Pesaswap docs or request it from [pesaswap@Pesaswap.in](mailto:pesaswap@Pesaswap.in)
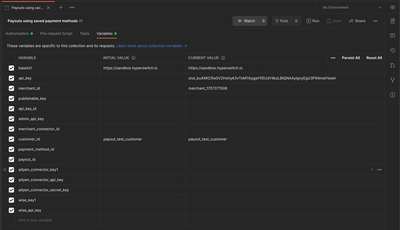
### Step 2 — Configure your Postman environment
Set the following **environment variables**:
| Variable | Value |
| ------------- | ----------------------------- |
| `baseUrl` | `https://sandbox.pesaswap.io` |
| `merchant_id` | Your merchant ID |
| `api_key` | Your generated API key |
> Keep your API key secure. Never expose it in client-side code.
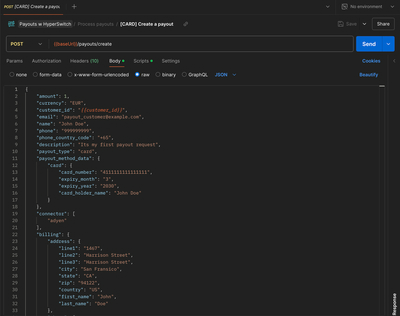
### Step 3 — Process payouts
Go to the **“Process Payouts”** section in the collection and send a request using either:
* A saved `payment_method_id`
* A newly added payment method
> Make sure the payout method is compatible with the configured payout processor.
## Steps for processing payouts
### Step 1 - Import postman collection from here.
## Processing Payouts via Postman
### Step 1 — Import the Postman collection
> Download the collection from the official Pesaswap docs or request it from [pesaswap@Pesaswap.in](mailto:pesaswap@Pesaswap.in)
### Step 2 — Configure your Postman environment
Set the following **environment variables**:
| Variable | Value |
| ------------- | ----------------------------- |
| `baseUrl` | `https://sandbox.pesaswap.io` |
| `merchant_id` | Your merchant ID |
| `api_key` | Your generated API key |
> Keep your API key secure. Never expose it in client-side code.
### Step 3 — Process payouts
Go to the **“Process Payouts”** section in the collection and send a request using either:
* A saved `payment_method_id`
* A newly added payment method
> Make sure the payout method is compatible with the configured payout processor.
## Steps for processing payouts
### Step 1 - Import postman collection from here.
 ### Step 2 - Navigate to Variables tab to set up below variables
* baseUrl
* merchant\_id
* api\_key
### Step 2 - Navigate to Variables tab to set up below variables
* baseUrl
* merchant\_id
* api\_key
 ### Step 3 - Head to "Process payouts" section for processing payouts.