> ## Documentation Index
> Fetch the complete documentation index at: https://docs.pesaswap.io/llms.txt
> Use this file to discover all available pages before exploring further.
# Activate-connector-on-pesaswap
# Pesaswap Control Center: Connector Management Guide
## Steps to Activate Connector on the Pesaswap Control Center
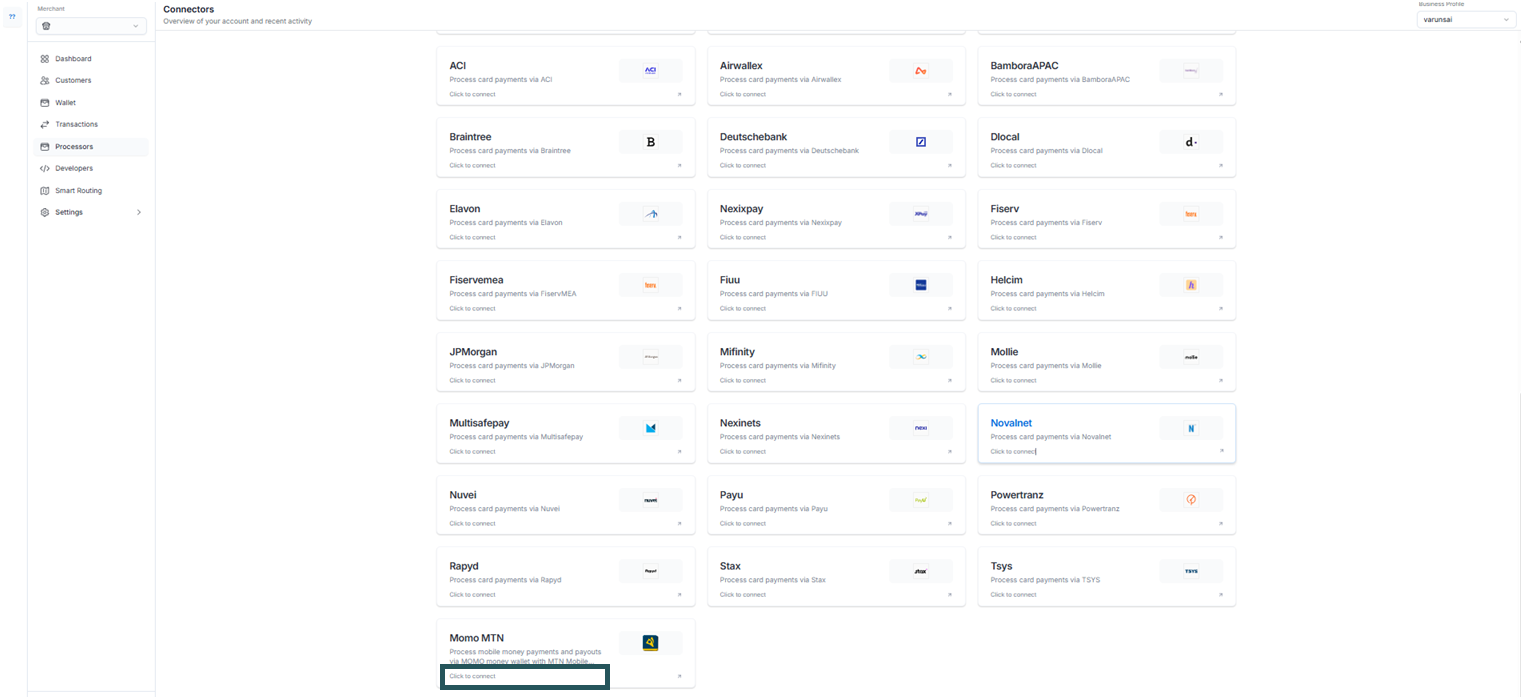
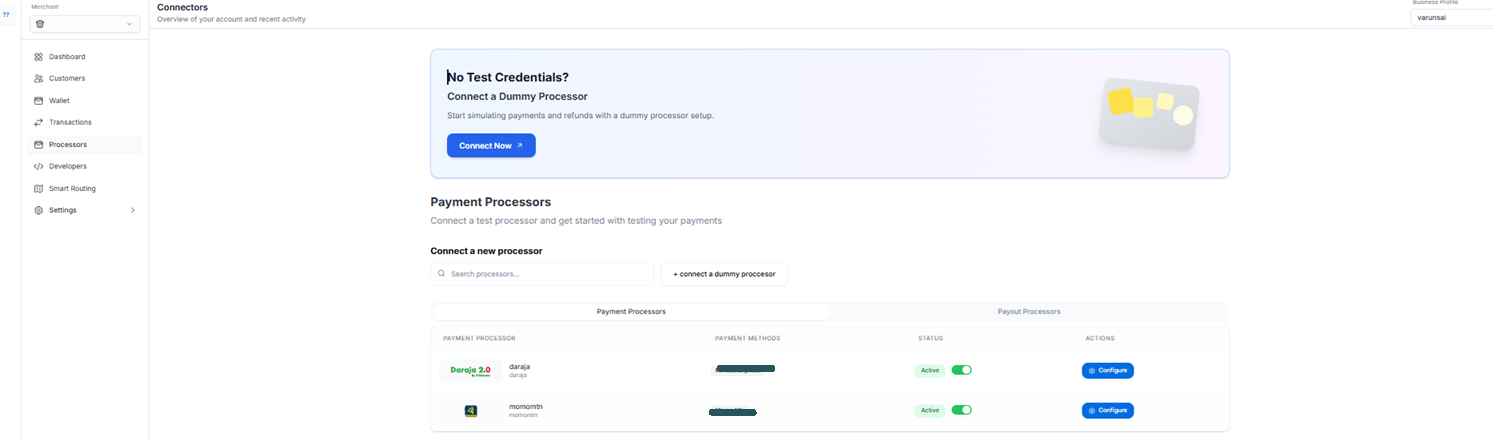
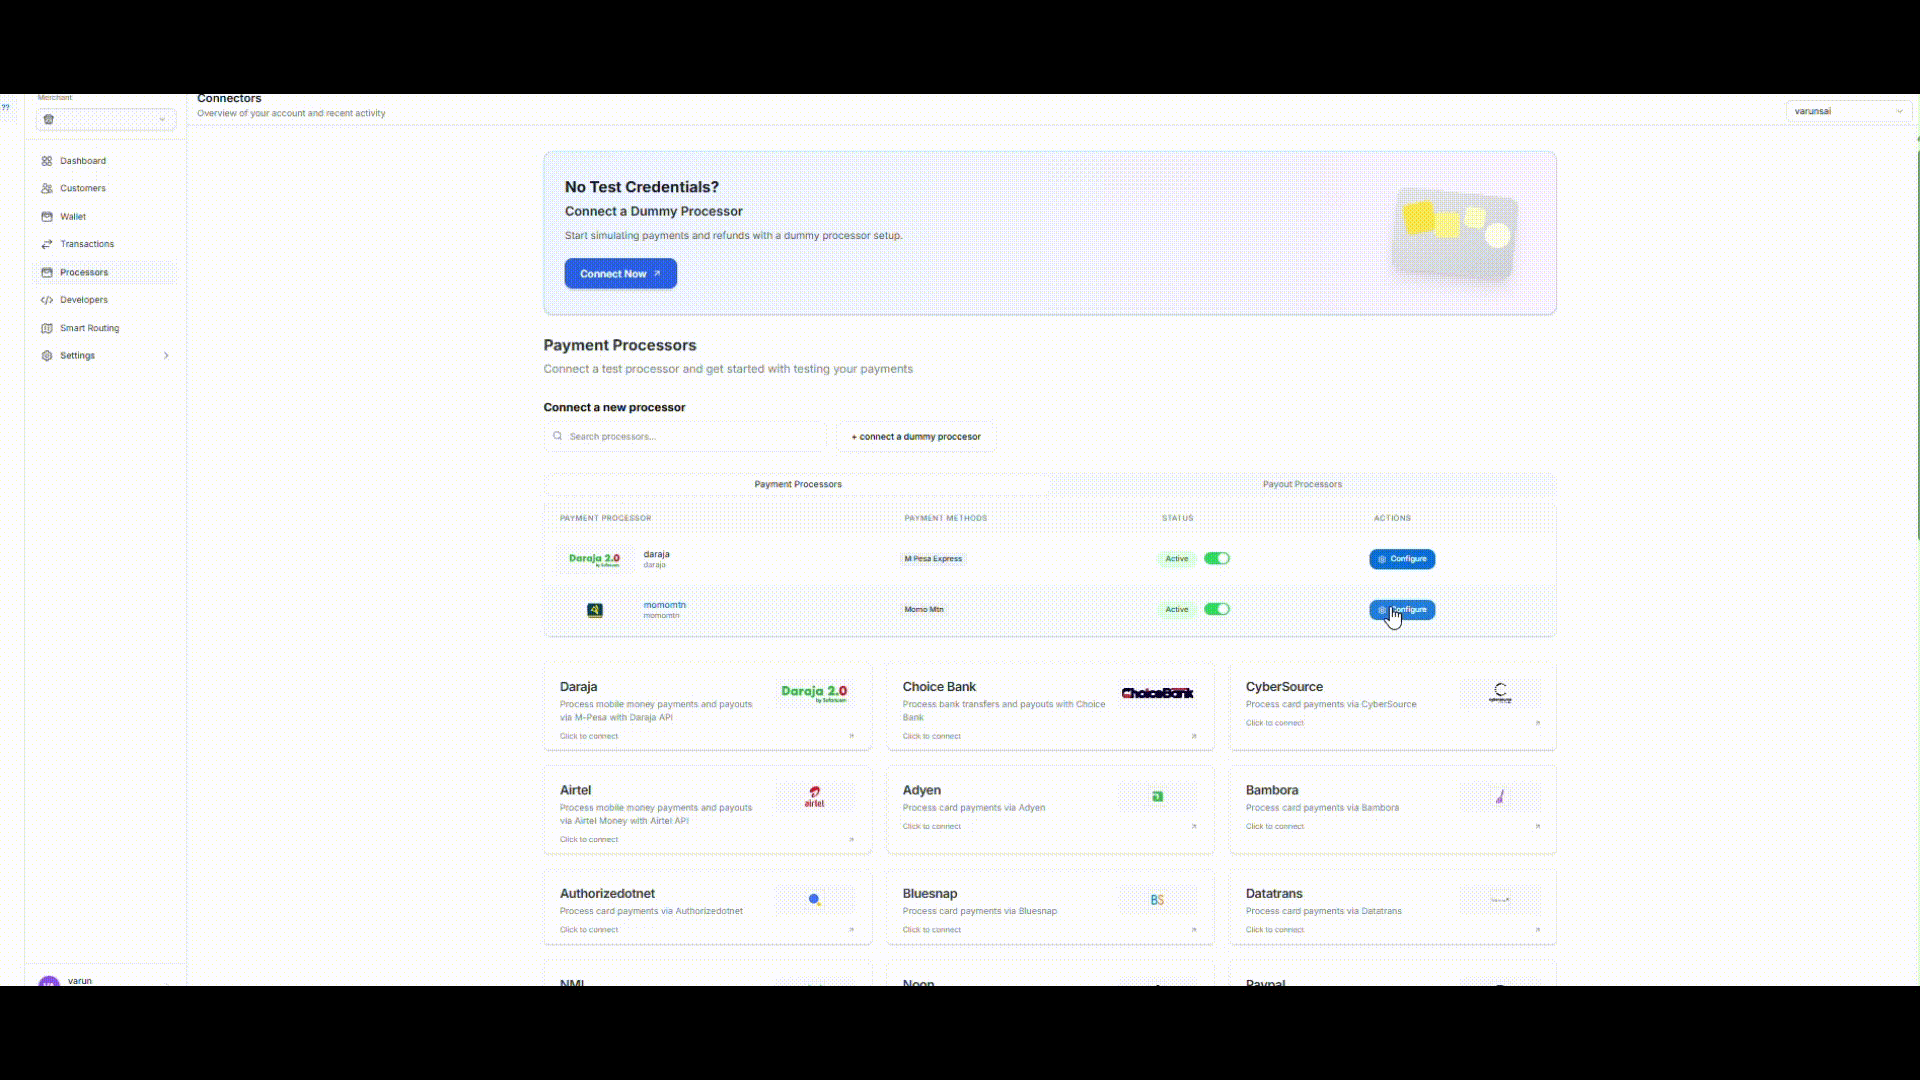
### 1. Access Connectors Section
* Navigate to the Connectors section on the Control Center
* Select the desired connector using the **+ Connect** button
 ### 2. Profile Details
* Profile ID will be selected automatically in the Pesaswap Control Centre
* To change the profile, switch from the dropdown at the top right of the dashboard
### 2. Profile Details
* Profile ID will be selected automatically in the Pesaswap Control Centre
* To change the profile, switch from the dropdown at the top right of the dashboard
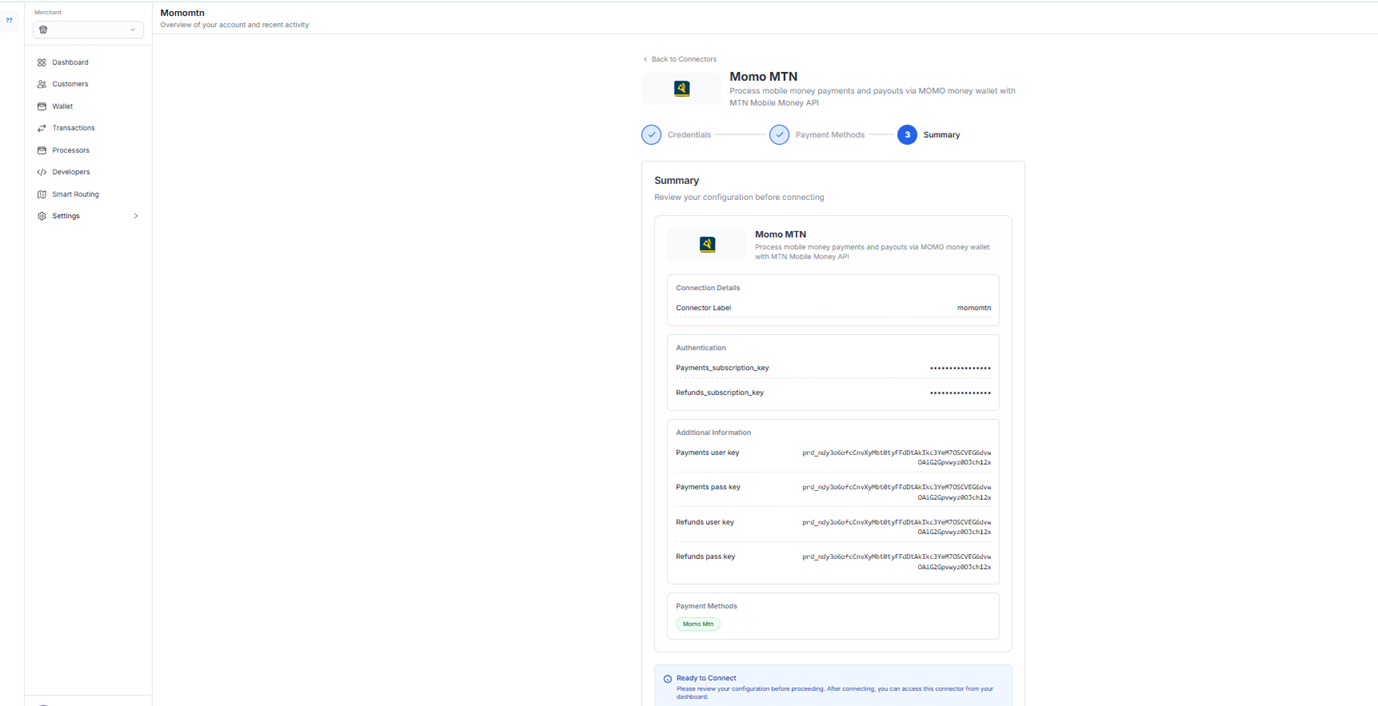
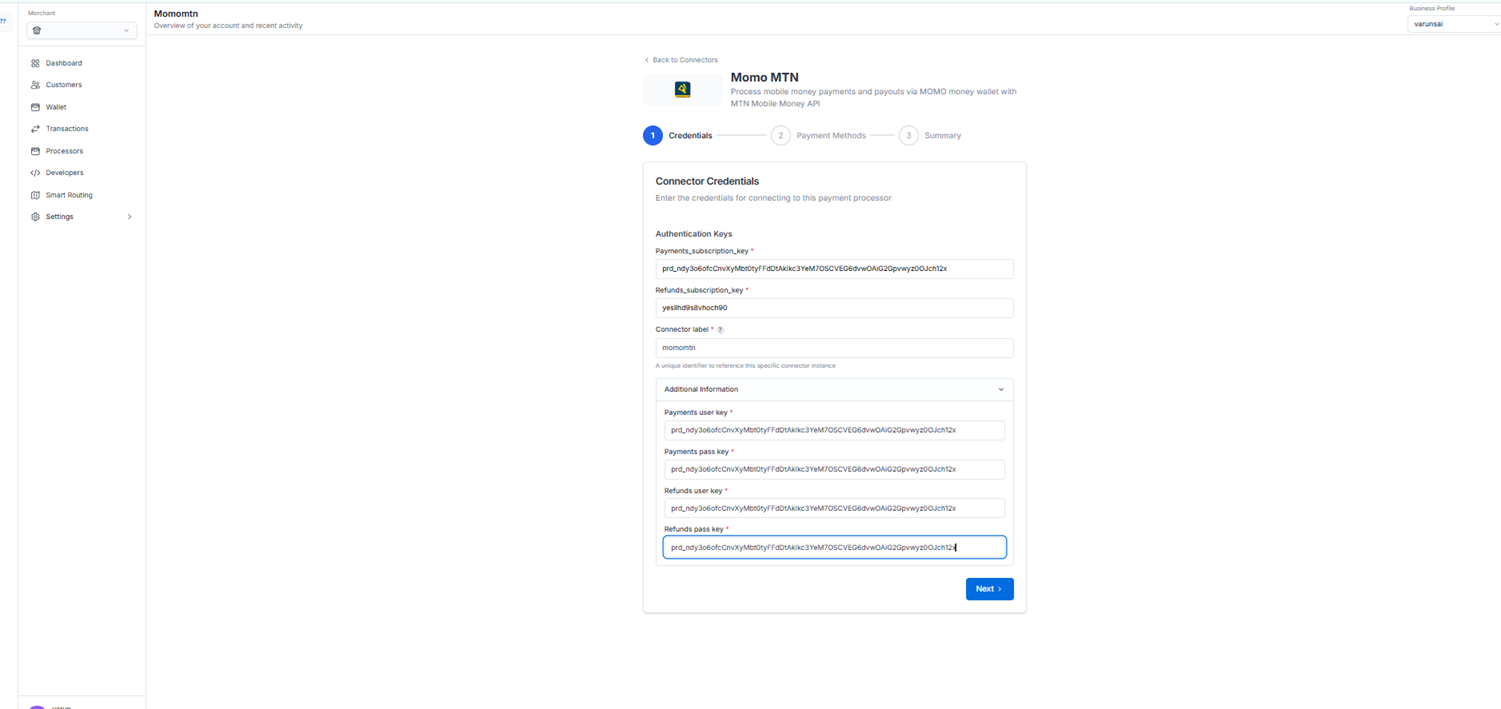 ### 3. Configure the Connector Details
* Enter the required credentials for the selected connector obtained during signup or from the connector dashboard
* Define a unique identifier for the connector under your business profile
### 4. Enable Payment Methods
* Choose the payment methods for the demo checkout
### 3. Configure the Connector Details
* Enter the required credentials for the selected connector obtained during signup or from the connector dashboard
* Define a unique identifier for the connector under your business profile
### 4. Enable Payment Methods
* Choose the payment methods for the demo checkout
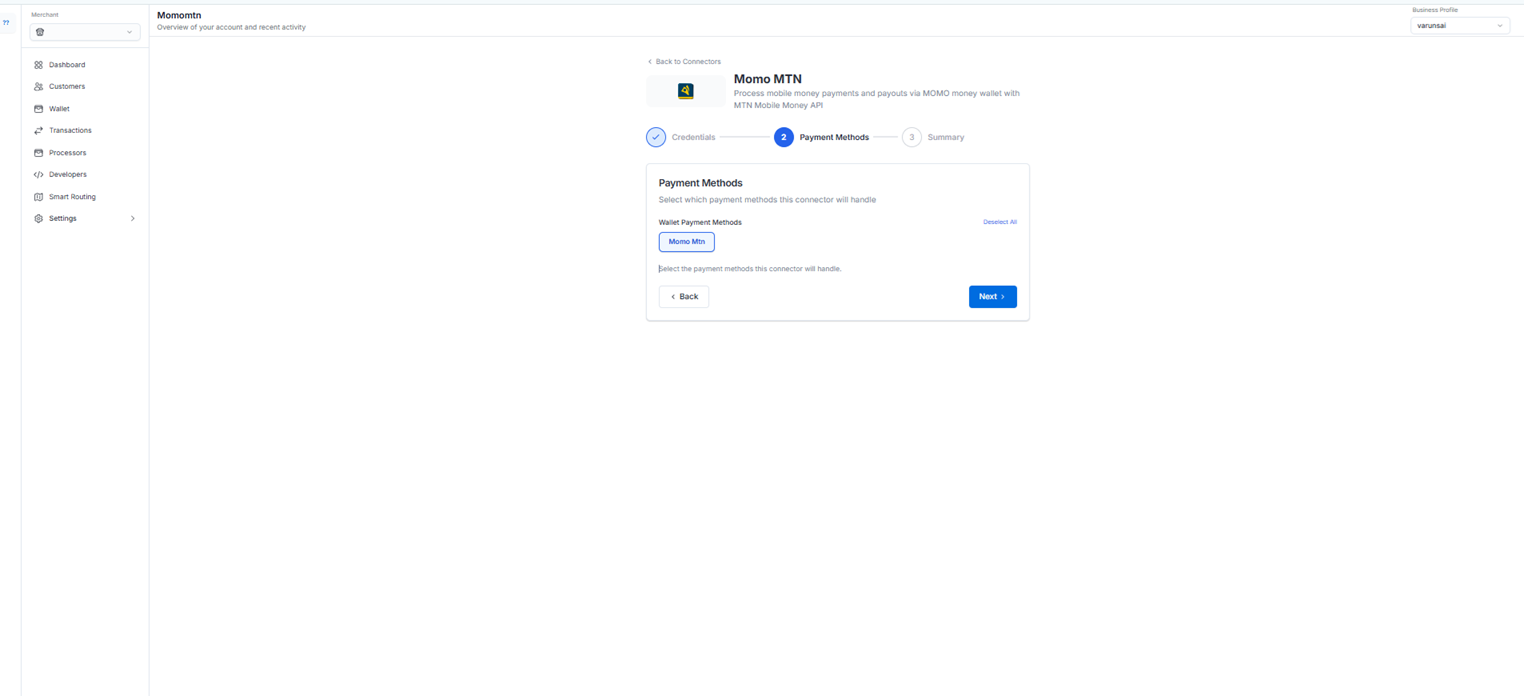 * Select all applicable payment methods that you want to support
### 5. Configure Webhooks (Optional)
* If the selected connector supports webhooks, copy the URL from Control Center
* Configure the webhook URL in the connector dashboard
* This ensures real-time payment status updates
* Select all applicable payment methods that you want to support
### 5. Configure Webhooks (Optional)
* If the selected connector supports webhooks, copy the URL from Control Center
* Configure the webhook URL in the connector dashboard
* This ensures real-time payment status updates
 ### 6. Try a Payment
* Test the integration with a demo payment
* Verify that all configured payment methods work correctly
* Check webhook functionality if configured
## Edit Connector Credentials on the Pesaswap Control Center
To update connector credentials on Pesaswap, you will need to re-enter all the fields required for credentials.
### Steps to Update Credentials
#### 1. Access Connectors Section
* Navigate to the Connectors section on the Control Center
* Find all the existing connector integrations for the selected profiles
### 6. Try a Payment
* Test the integration with a demo payment
* Verify that all configured payment methods work correctly
* Check webhook functionality if configured
## Edit Connector Credentials on the Pesaswap Control Center
To update connector credentials on Pesaswap, you will need to re-enter all the fields required for credentials.
### Steps to Update Credentials
#### 1. Access Connectors Section
* Navigate to the Connectors section on the Control Center
* Find all the existing connector integrations for the selected profiles
 #### 2. Profile Details
* Profile ID will be selected automatically in the Pesaswap Control Centre
* To change the profile, switch from the dropdown at the top right of the dashboard
#### 3. Update the Credentials
* Click on the **edit icon** alongside the API keys
* This will open a pop-up window to enter the credentials for the connectors
* Fill in all required credential fields
* Save the updated configuration
#### 2. Profile Details
* Profile ID will be selected automatically in the Pesaswap Control Centre
* To change the profile, switch from the dropdown at the top right of the dashboard
#### 3. Update the Credentials
* Click on the **edit icon** alongside the API keys
* This will open a pop-up window to enter the credentials for the connectors
* Fill in all required credential fields
* Save the updated configuration
 ## Important Notes
* **Credential Security**: Always ensure your API keys and credentials are kept secure
* **Testing**: Test your connector after any credential updates
* **Backup**: Keep a record of your previous working credentials before making changes
* **Support**: Contact Pesaswap support if you encounter issues during configuration
## Troubleshooting
### Common Issues
* **Invalid Credentials**: Double-check all API keys and secrets
* **Webhook Configuration**: Ensure webhook URLs are correctly configured in both systems
* **Payment Method Conflicts**: Verify that selected payment methods are supported by the connector
* **Profile Mismatch**: Confirm you're working with the correct business profile
### Getting Help
* Check the Pesaswap documentation for connector-specific guides
* Contact support through the Control Center help section
* Review connector logs for detailed error information
## Important Notes
* **Credential Security**: Always ensure your API keys and credentials are kept secure
* **Testing**: Test your connector after any credential updates
* **Backup**: Keep a record of your previous working credentials before making changes
* **Support**: Contact Pesaswap support if you encounter issues during configuration
## Troubleshooting
### Common Issues
* **Invalid Credentials**: Double-check all API keys and secrets
* **Webhook Configuration**: Ensure webhook URLs are correctly configured in both systems
* **Payment Method Conflicts**: Verify that selected payment methods are supported by the connector
* **Profile Mismatch**: Confirm you're working with the correct business profile
### Getting Help
* Check the Pesaswap documentation for connector-specific guides
* Contact support through the Control Center help section
* Review connector logs for detailed error information