> ## Documentation Index
> Fetch the complete documentation index at: https://docs.pesaswap.io/llms.txt
> Use this file to discover all available pages before exploring further.
# Test a payment
### Test on Web Client
Once you have successfully run the control centre, you should be able to test the payments.
Account setup is a pre-requisite before you can test the payments.
There is a condition in which you might want to make a test payment:
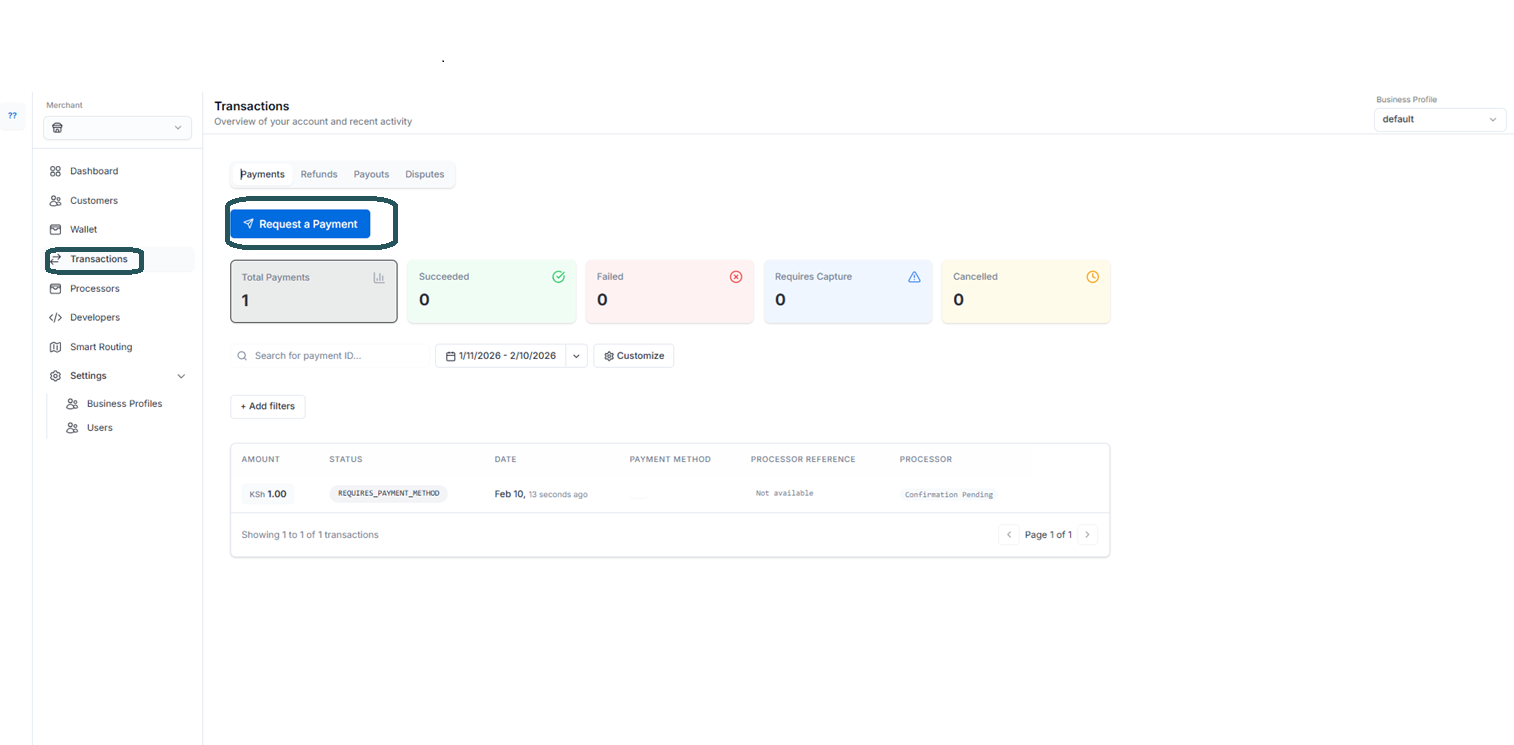
Local: Once you have got the Control Centre running (at [http://localhost:3000](http://localhost:3000)) and have configured your payment processor via it. You can go to Home section in Control Centre, and you will find a "try it out" button (Highlighted with blue colour in the image below).
Self Hosted Web App: In case you have hosted the SDK and integrated it on your app, you can do a usual release of your app. Post successful deployment, you can test the payments on your app url.
Playground deployment: In case you have deployed the demo app playground, you will see the playground up and running on the public IP that you received after deployment.
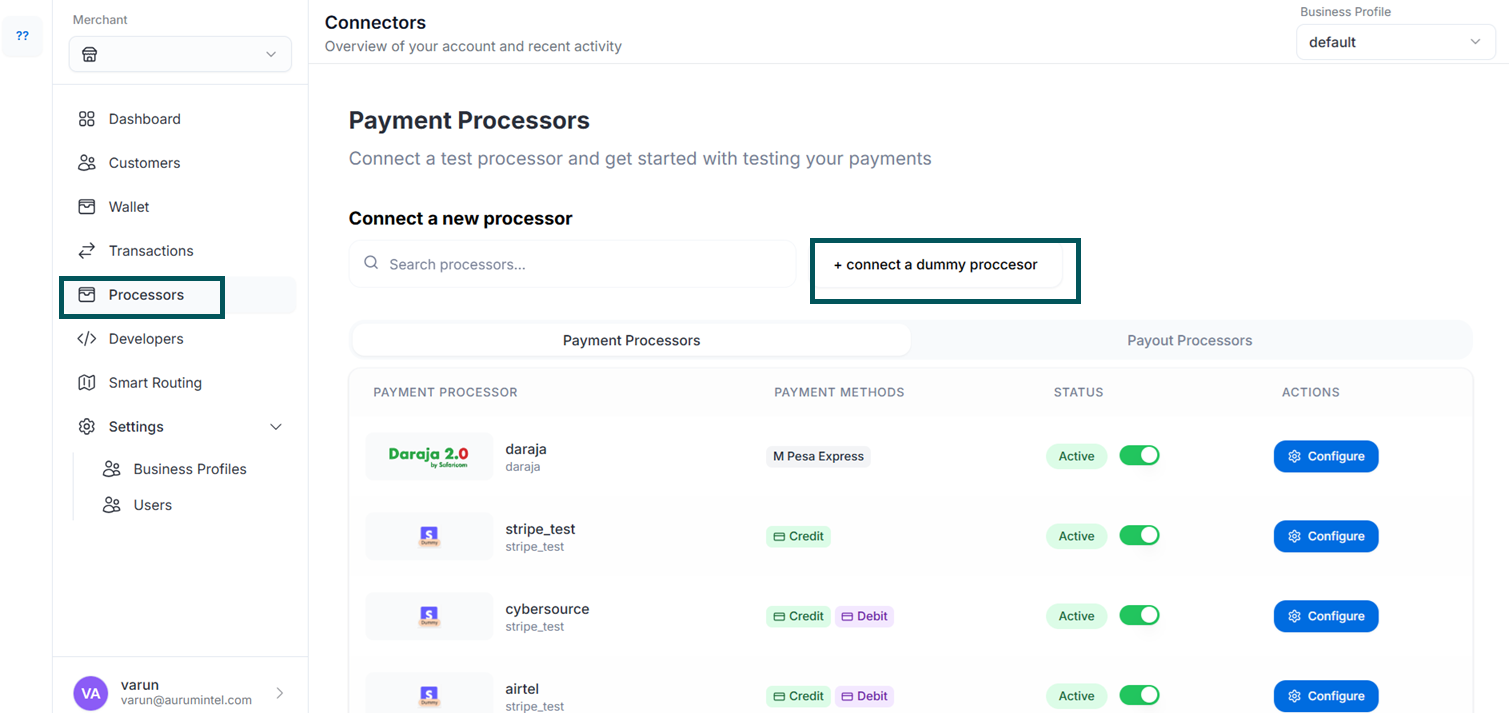
On Local, click on Connectors -> Payment Processors and Connect a Dummy Processor:
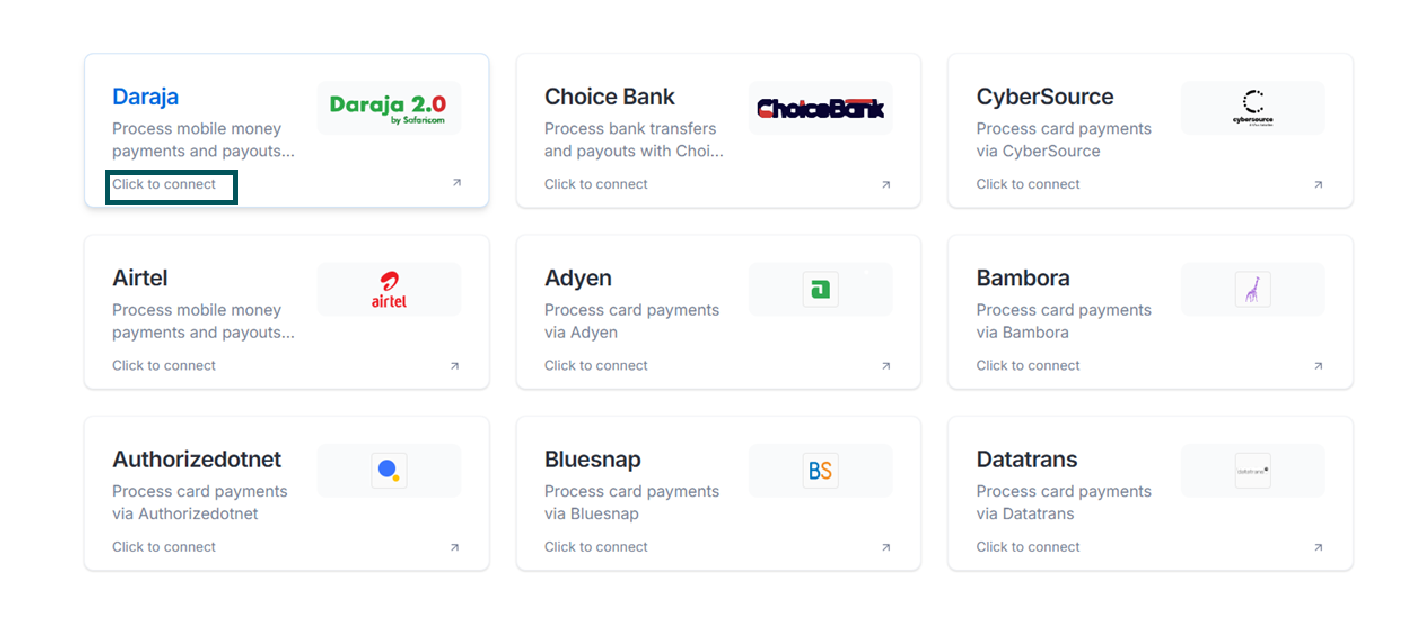
 Go ahead and connect any dummy processor, we'll show an example with the darja processor:
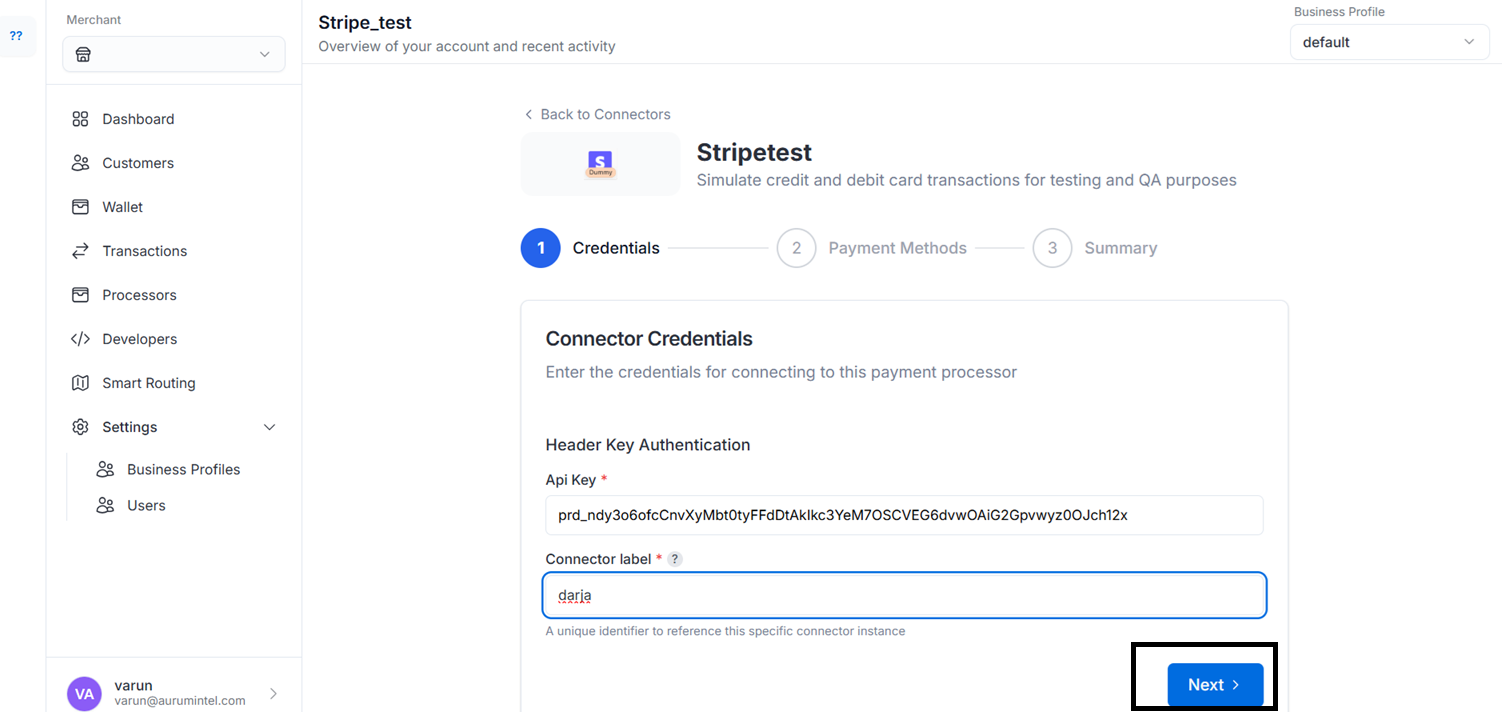
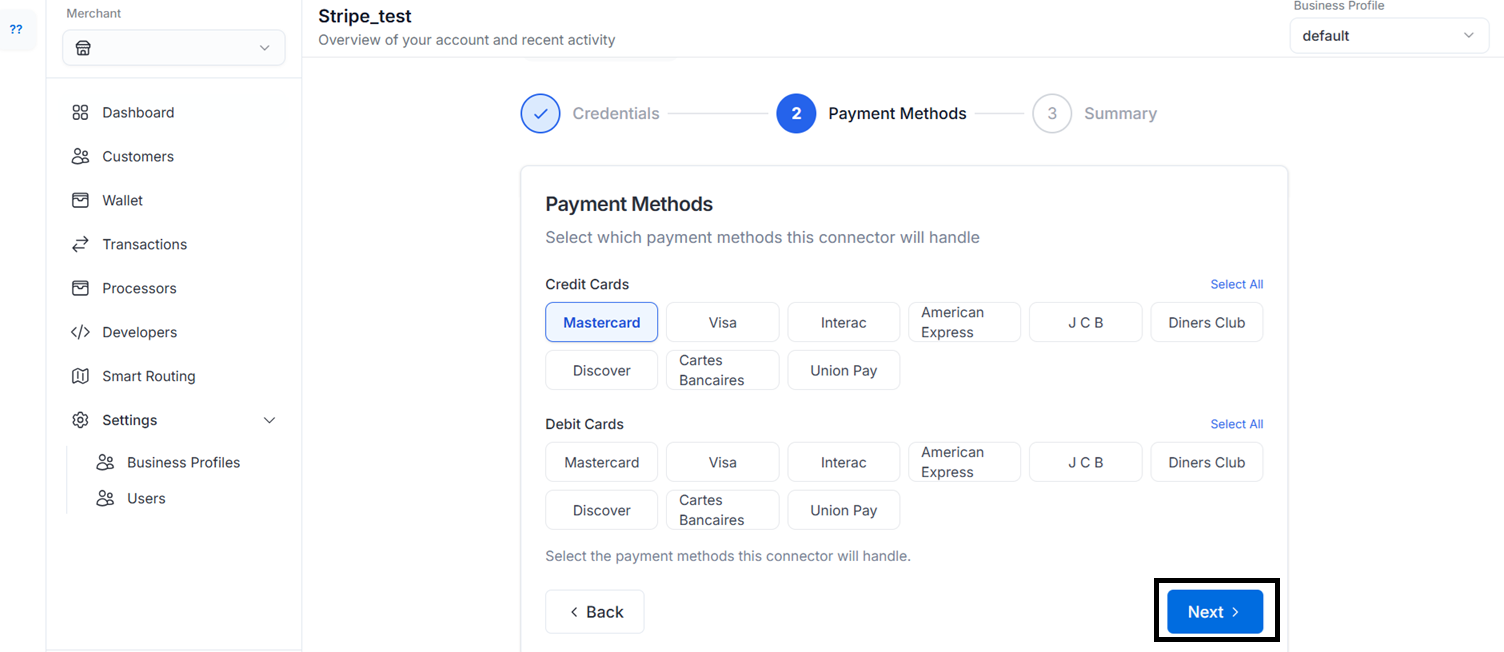
 Just connect and proceed with the provided credentials:
 From there, navigate back to the Home page and click on Try it out:
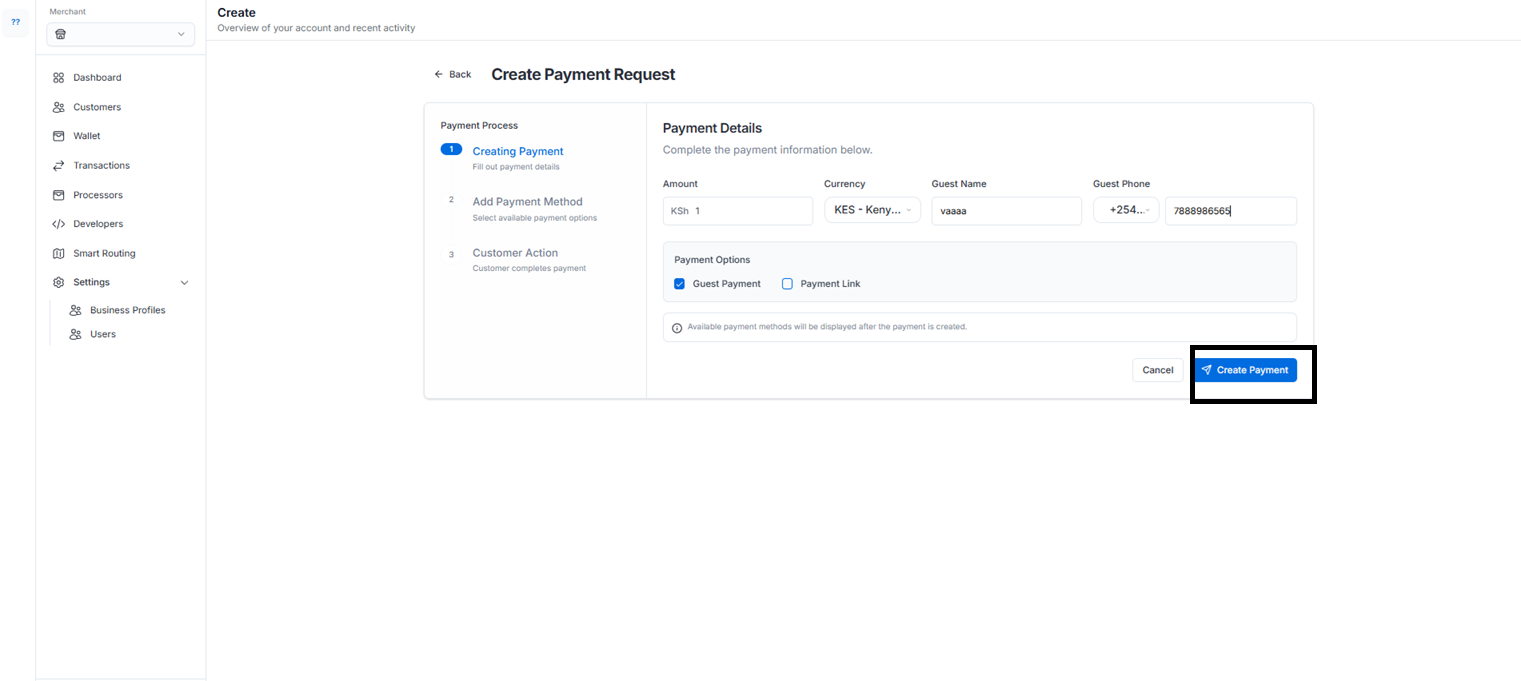
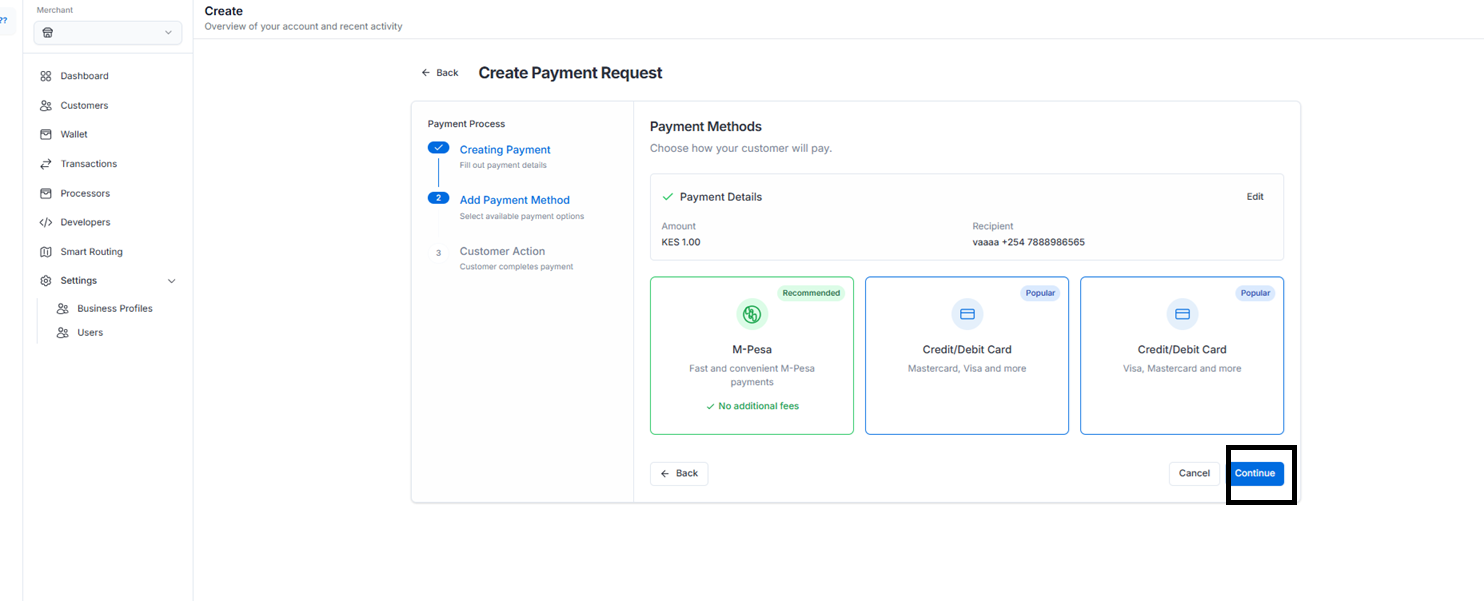 Input the credentials and Click on Pay 100: :
```plaintext theme={"system"}
Card Number: 4242 4242 4242 4242
Card Expiry: Any future date
CVC: Any 3 digits
```
You'll see a successful Payment:
Congrats! You have successfully tested an end-to-end payment with your own app server and the control center
In case you have integrated the web client on your app and want to test a payment, the payment status confirmation screen has to be handled by you. You will see that post payment confirmation.
Input the credentials and Click on Pay 100: :
```plaintext theme={"system"}
Card Number: 4242 4242 4242 4242
Card Expiry: Any future date
CVC: Any 3 digits
```
You'll see a successful Payment:
Congrats! You have successfully tested an end-to-end payment with your own app server and the control center
In case you have integrated the web client on your app and want to test a payment, the payment status confirmation screen has to be handled by you. You will see that post payment confirmation.